I recently did a guide on 5 (Less known) WordPress Security Tips to keep your website safe from hackers where I suggested moving wp-config.php outside the web root directory as a simple change that adds an additional layer of security to your WordPress website.
The wp-config.php file contains your MySQL database username & password, along with the encryption salts for all the login session cookies on the website – it is everything someone might need to completely take over your website.
Should you move wp-config.php outside the web root directory?
Yes! Moving your wp-config.php file is a no-brainer when you compare the benefits to the minimal added work.
Even WordPress Codex recommends that you move your wp-config.php away from its default install location as a way to of hardening WordPress.
Researchers at Wordfence recently discovered a large-scale attack that targeted vulnerabilities in outdated themes & plugins with the ultimate goal of obtaining access to the wp-config.php file. The attack targeted at least 1.3 million sites globally. Automated attacks like this, generally look in default locations for vulnerable files, so moving your wp-config.php file will help make these automated methods fail.
What it won’t do is protect you if your FTP (old school!) or SSH credentials get compromised – in that case, you have a major breach of completely different severity. However, security is all about adding layers and making it more difficult for the bad guys.
How to move wp-config.php outside the web root directory?
If you have multiple websites, just repeat these two steps for each one, naming the files appropriately (for instance, example.com.config.php). example.net.config.php
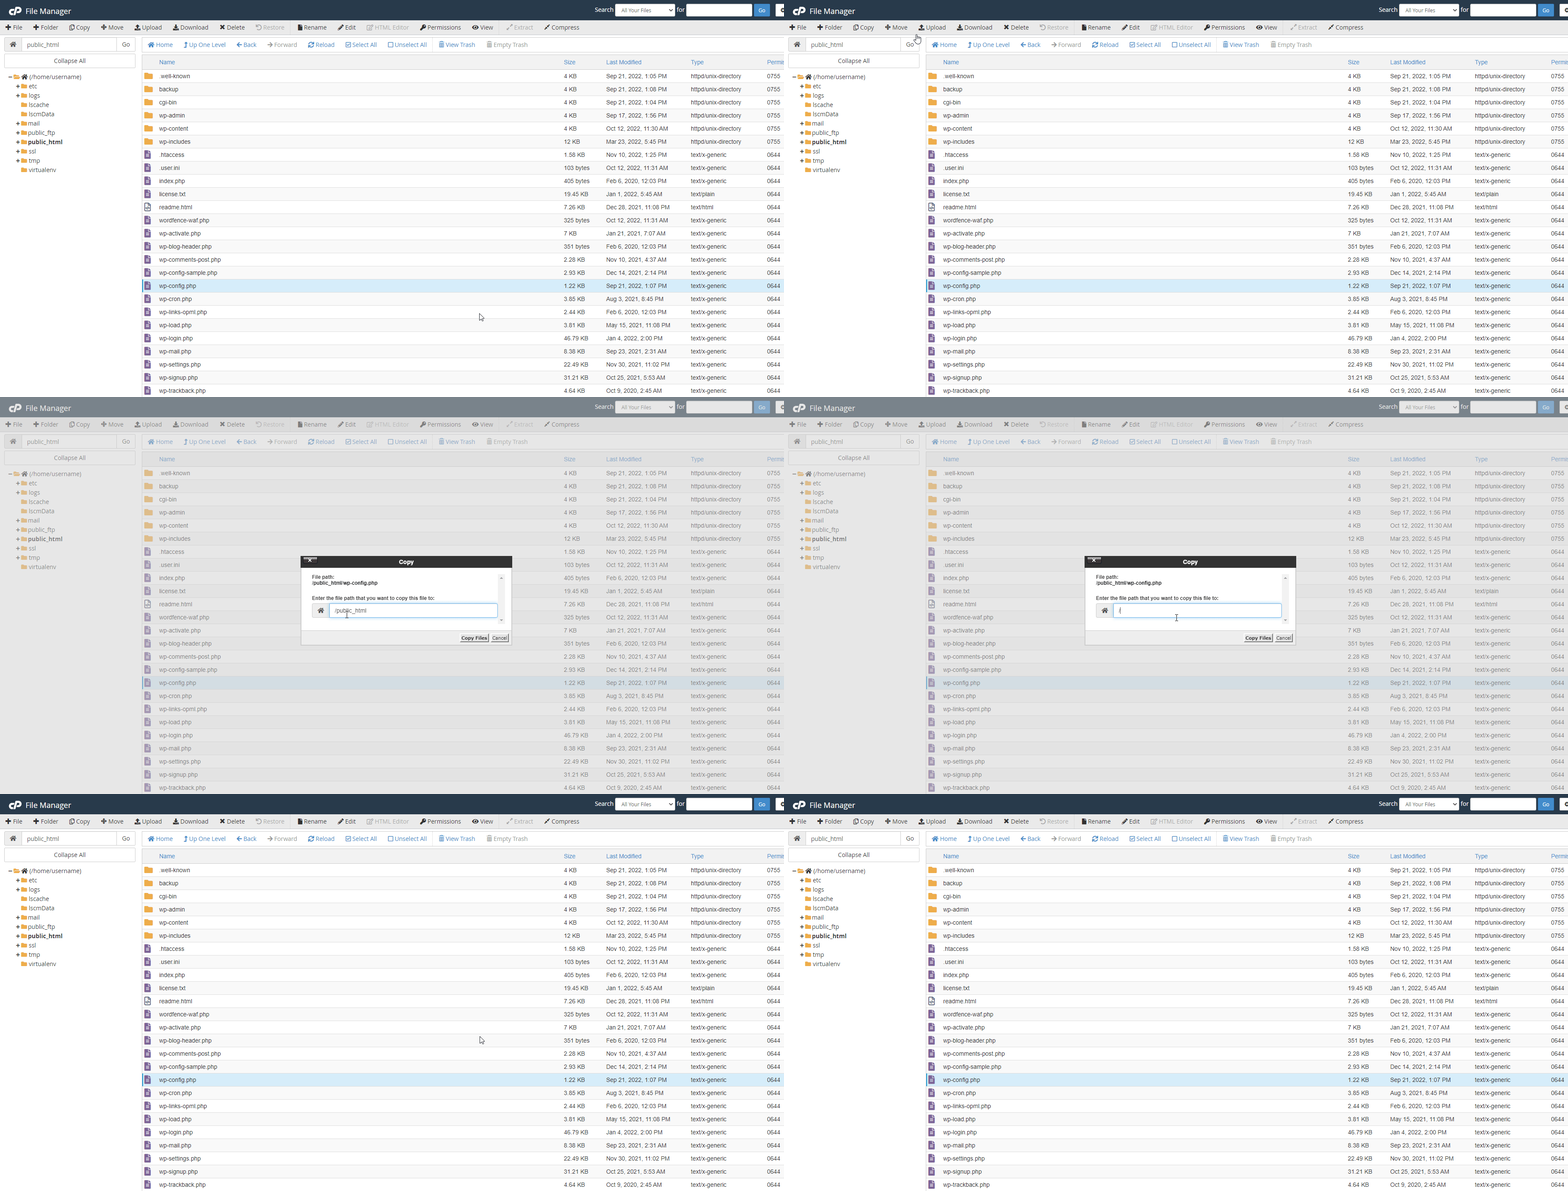
Step 1. Copy the wp-config.php file outside of your public_html directory & rename it to something else
Copy your wp-config.php file and place it in the folder above. Once it’s there, rename it so that it doesn’t immediately become clear that it’s the wp-config.php file. Again, we do this to prevent bots and malicious scripts from seeing results when they conduct mass searches for the filename “wp-config.php.”
Although I’ve kept the name wp-config.php in this example, you may give yours any name you want. The only requirement is that it must end in “.php.”

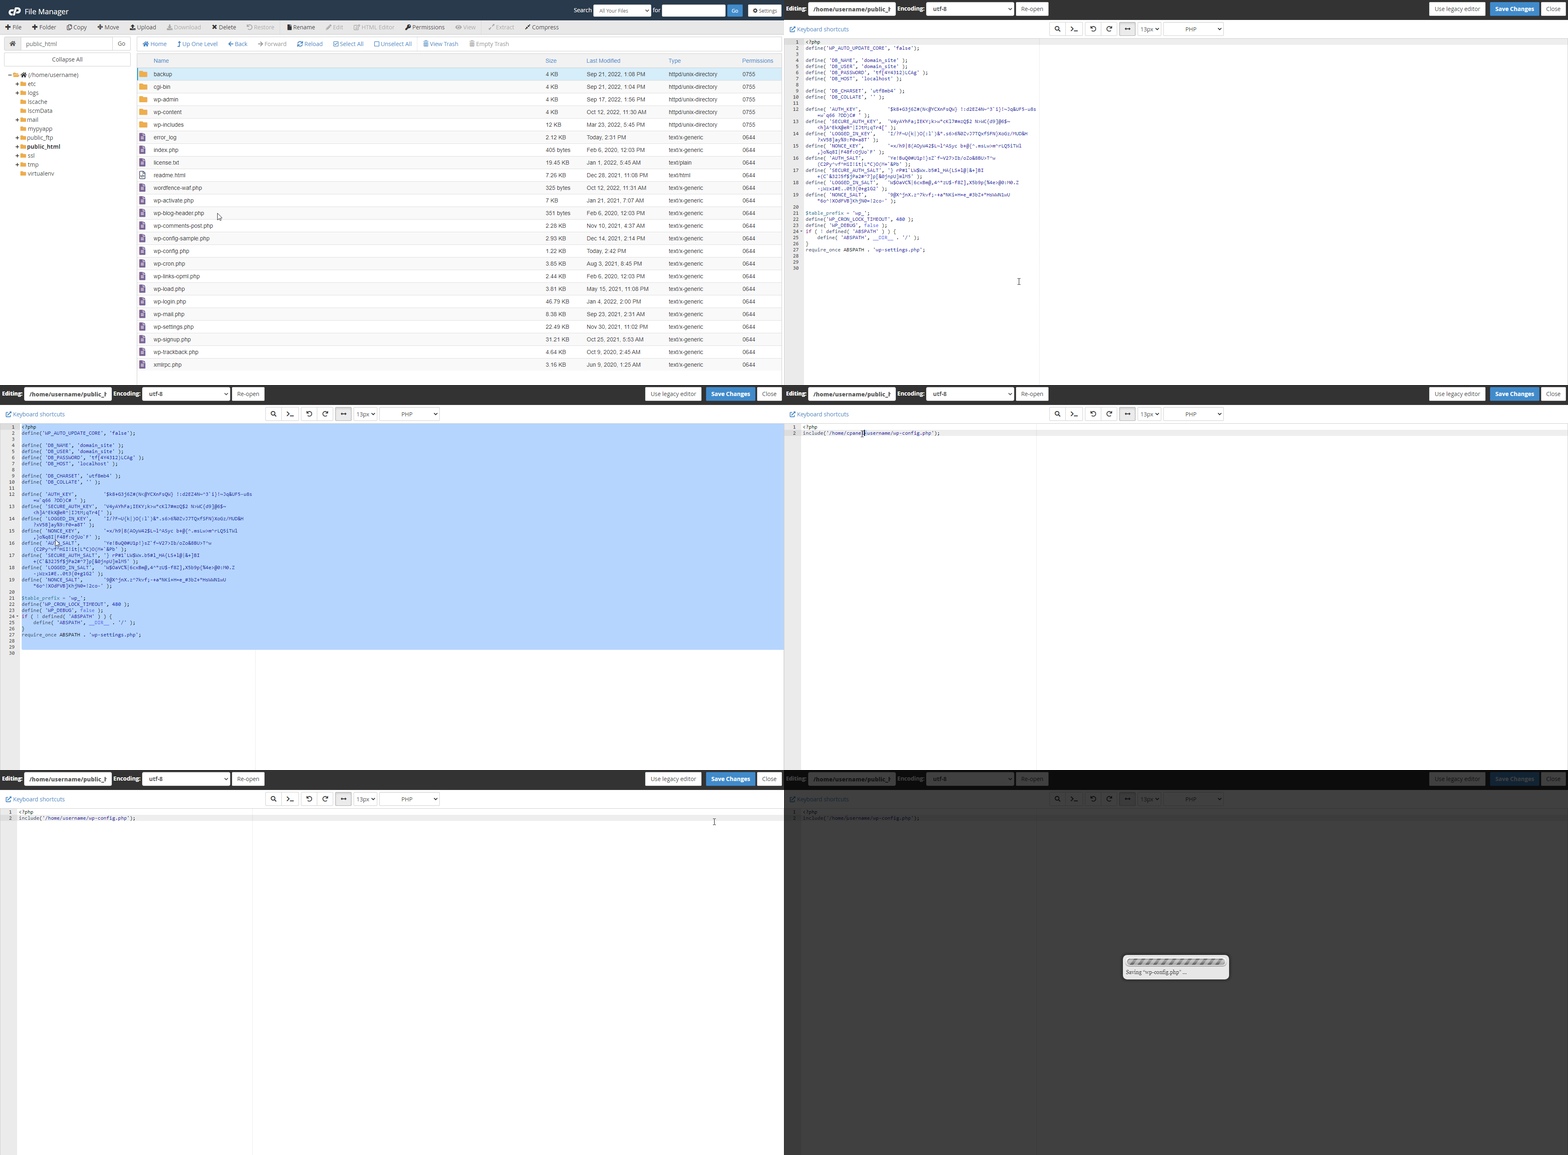
Step 2. Edit your current wp-config.php file to point to the new file
Edit the original wp-config.php file, delete everything within, and then add this short piece of code in its place.
<?php
include('/home/cpanel-username/wp-config.php');
💡 Make sure to replace the ‘cpanel-username‘ with your server username and wp-config.php with the new file name.

Step 3. Limit access to the new configuration file using .htaccess
This is an optional step that I recommend doing because it will basically disable direct access to the new configuration file.
Create a new (or edit existing) .htaccess file in the root directory (one folder above public_html) and add the following code:
<files wp-config.php>
order allow,deny
deny from all
</files>
💡 Replace wp-config.php with the new file name
That’s it!
Your website should load smoothly now that it is reading its configuration information from a file that is no longer located in the directory that is open to the public.
Technically, the wp-config.php file that was previously in your WordPress installation directory still exists, but it now only serves as a pointer to the non-public folder’s version of the file.
If your website won’t load and shows an HTTP 500 error it is usually because the filename has a mistake or the server’s absolute path has been entered incorrectly. If this is the case, re-check the wp-config file.
The only drawback is that some plugins that write to the wp-config.php file (like iThemes Security) no longer have access, and you will need to manually add code if needed.

